
Learn how to create and look up fire simulations with Genasys EVAC.
In this guide, you’ll learn how to
- Create a new fire simulation using current and advanced weather parameters
- Look up existing fires
- Troubleshoot failed fire simulations
Create a new fire simulation with current weather
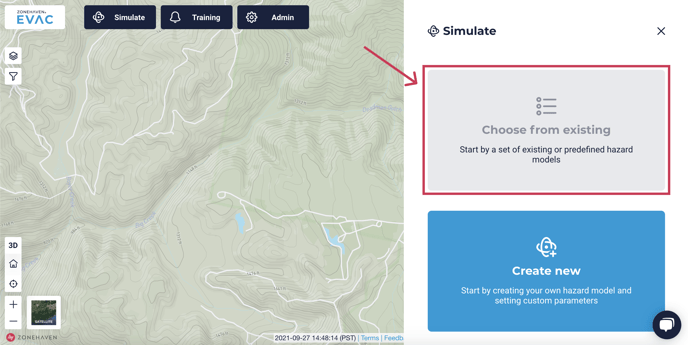
Step 1: To start simulations, go to Genasys EVAC and click on the Simulate button.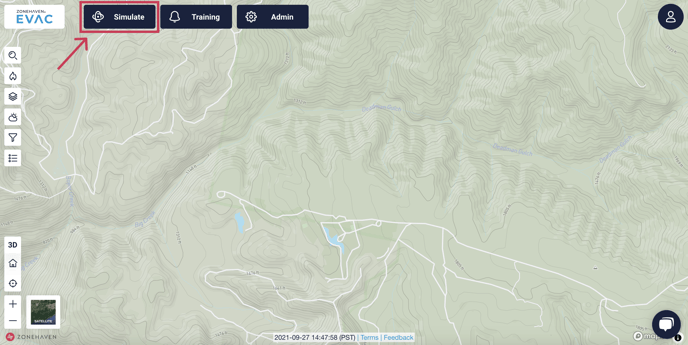
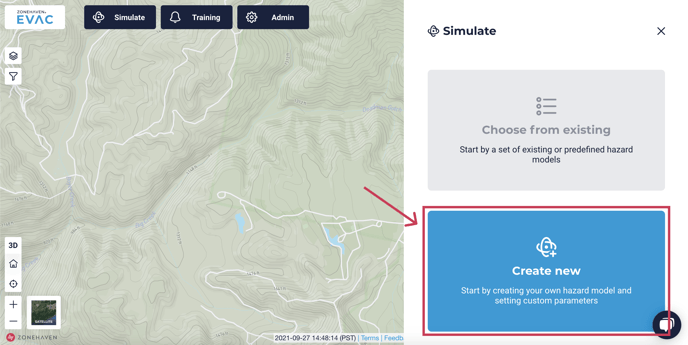
Within the simulation home screen there are two options: 'Choose from existing' and 'Create new.'
Step 2: 'Choose from existing' allows you to view an already simulated fire, and 'Create new' allows to simulate a new fire. To start a new simulation, select 'Create new.'
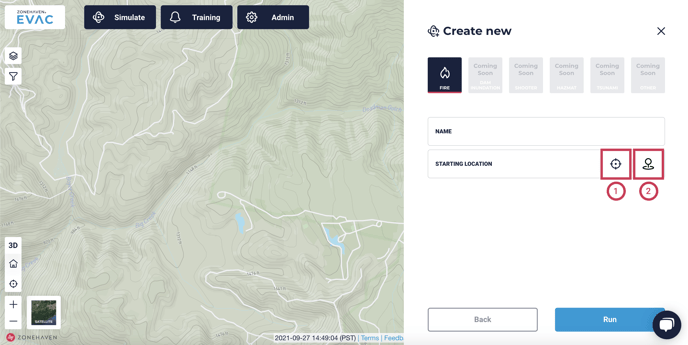
After clicking on 'Create new' from the simulate landing page, you will arrive at the following screen. You will be prompted to enter the fire name (example: “Test Fire”) and select a starting location. Starting location can be either your current location (1), or any location when you drag and drop the pin icon (2).
When a fire name is given and the location is selected, you will be given options for simulation weather conditions. Forecasted weather is selected as the default. After the starting location is specified, it will be identified by a blue fire icon on the map and will have associated current weather conditions.
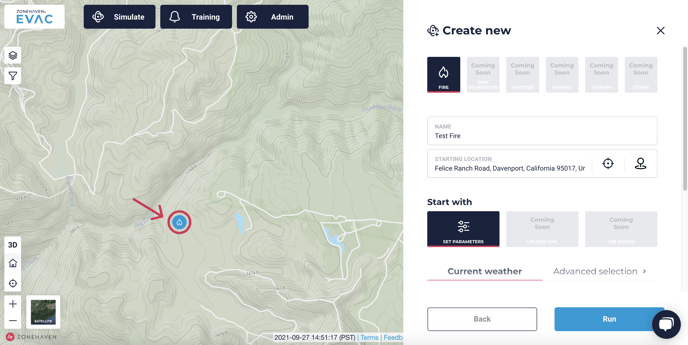
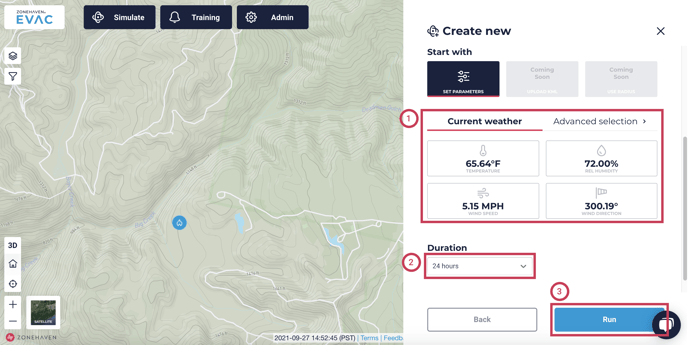
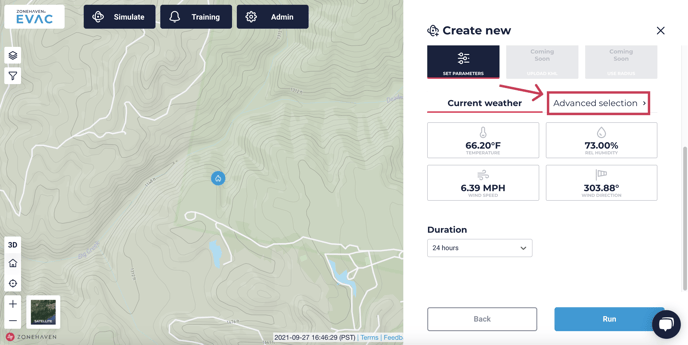
When using the 'Current weather' screen (1), weather forecasting will be used to simulate weather. You can select a fire 'Duration' (2) anywhere from 1-hr to 24-hrs (5-hours is the default, 24-hours is selected here).
Click 'Run' (3) to simulate a fire.
After clicking 'Run,' the simulation status will be shown.
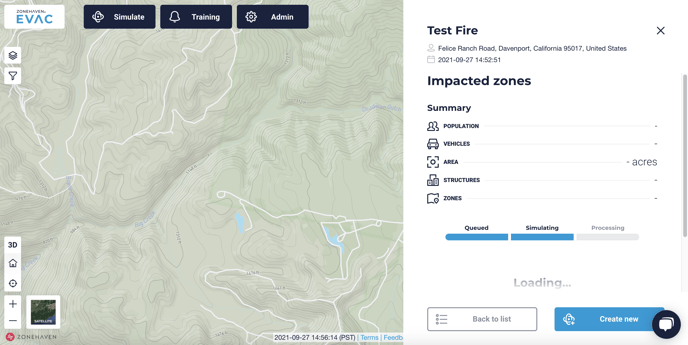
Please note: Fires can take anywhere from 2 min to 20 minutes to simulate, depending on fire size and duration. You can stay on the page and wait for the simulation to finish, or you can create a new fire simulation ('Create new' button), look at other fires that were already simulated or check on progress of other fires being simulated ('Back to list' button), or you can quit the app altogether. The main thing to know is that once the simulation has started, it will not be canceled.
Once the simulation completes, you will be shown hour-by-hour fire simulation perimeters, along with highlighted zones affected by the fire (red dots fill), and summary statistics of the impacted zones, representing population, number of vehicles, area, and structures of the affected zones.
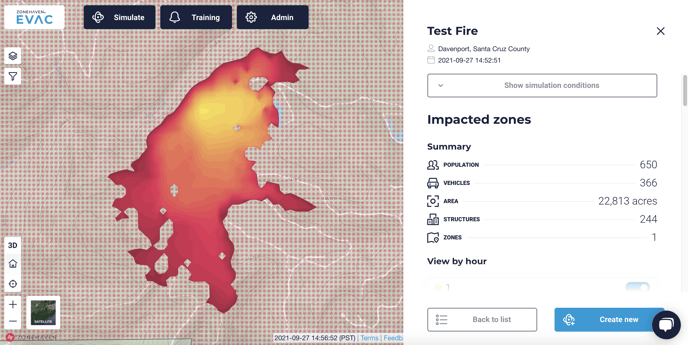
Please note: Statistics of the impacted zone correspond to the area of zones and not the fire perimeter itself.
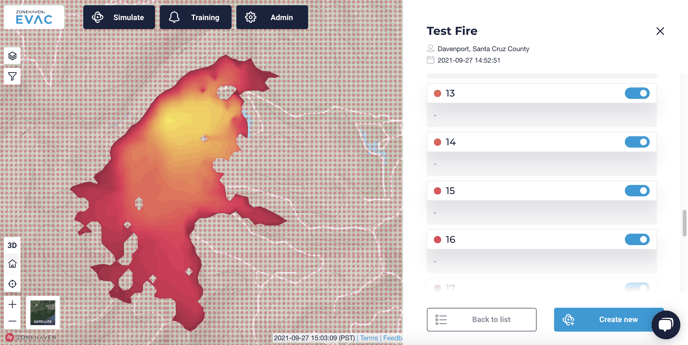
To simulate a new fire, you can click the 'Create new' button in the bottom right.
Create a new fire simulation with advanced weather
To model a fire using historical, customized, or extreme weather conditions, click on the 'Advanced selection' tab after specifying the fire name and its starting location.
Historical weather
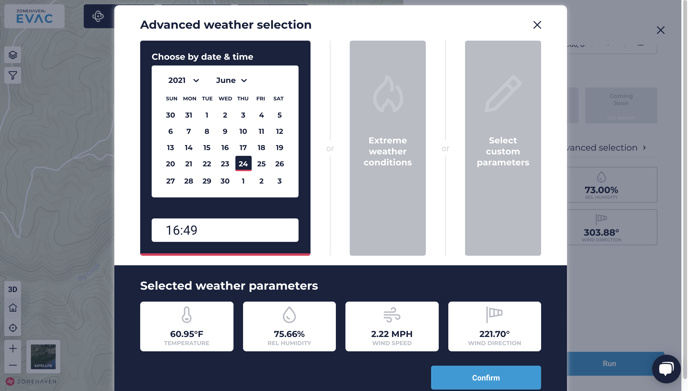
In the 'Advanced weather selection' menu, you will be taken to the 'Choose by date & time' selection first. There, you can select date and time which can be in the future as long as the end of the simulation will not exceed 24-hrs into the future. For dates in the past, weather station record will be used from the closest available station. For the time-periods that include the future, weather forecasts will be used. 'Selected weather parameters' will show weather for the selected date and time for the starting location of the simulation. If some or all values are missing, there may not be a complete weather record for the selected location and/or time. Weather time-series will be used for the entire duration of the fire simulation (you are only shown weather at the start of the fire simulation).
Extreme weather
You can also select 'Extreme weather conditions' which is meant to represent Santa Ana & Diablo winds (wind direction from the North-East or 45°) with relatively fast wind speeds and dry and hot conditions.

Custom weather
Lastly, if you want very specific weather conditions, you can specify them yourself in the 'Select custom parameters' selection. These weather conditions will be used for every time-step of the fire simulation.
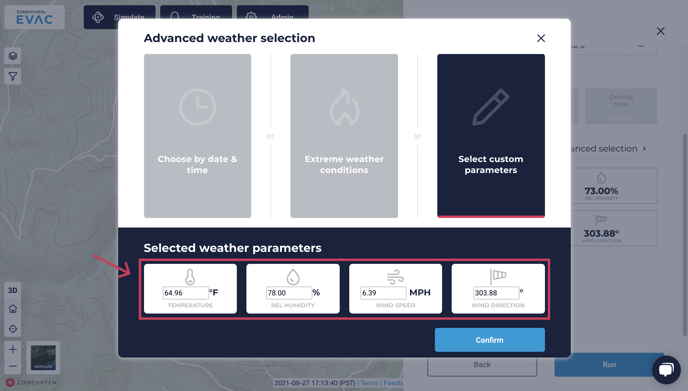
Wind direction is specified in degrees, where 0º corresponds to wind blowing from the north, 45º from the North-East, 90º from the West, etc.

Look up existing fires
To look up all the fires that were simulated or are being simulated by you, click on 'Choose from existing' from the main simulations landing page.
You can also access the list of fires by clicking on 'Back to list' button that appears at multiple stages within the 'Create new' workflow described above.

A list of all user-simulated fires with the simulation status reason will be provided.
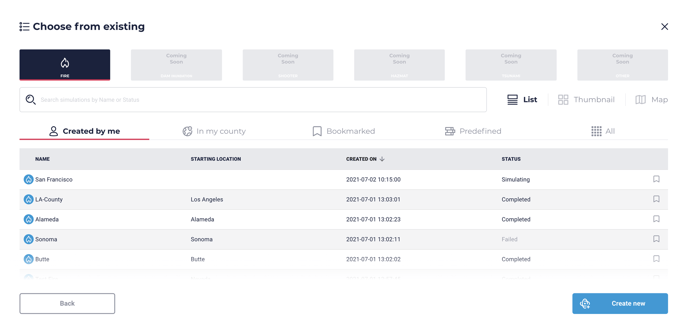
You can view the same list with the fire perimeter thumbnail or with their starting locations plotted on the map using the corresponding options in the upper right corner.
Failed fire simulations
If a fire simulation fails, it could be due to one of multiple reasons:
- The fire did not ignite either due to wet fuel condition.
- The ignition point was not ignitable (e.g. road or building).
- Weather data was not available.
If the failure reason is known, it will be provided.
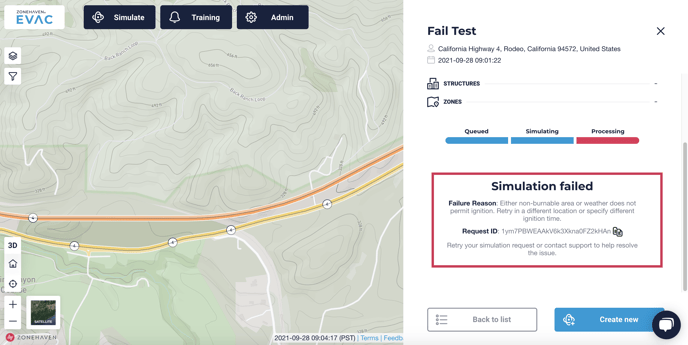
In the example above, the reason for the simulation failure was given as:
“Either non-burnable area or weather does not permit ignition. Retry in a different location or specify different ignition time”.
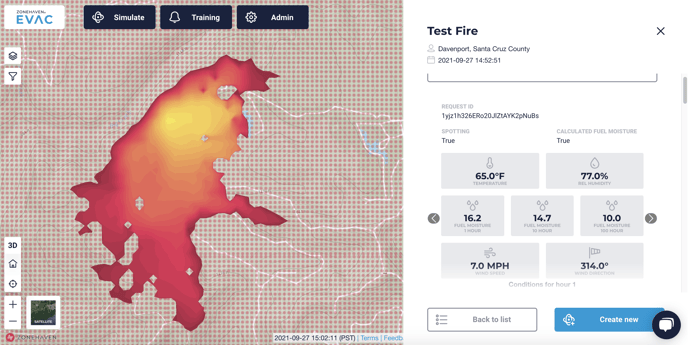
The user is also provided with a Request ID corresponding to the simulation, which can be used when contacting the Genasys support team (support@genasys.com).
Please note: If the above error occurs, it is possible that the conditions could be too wet for the fire to start (see simulation conditions for relative humidity and fuel moisture for the first hour of simulation). Otherwise, it is possible that the ignition point is located in a non-burnable area (pavement, some agricultural feeds, rock outcrops, roof-tops). Use satellite view to check if the starting location of the simulation can ignite.
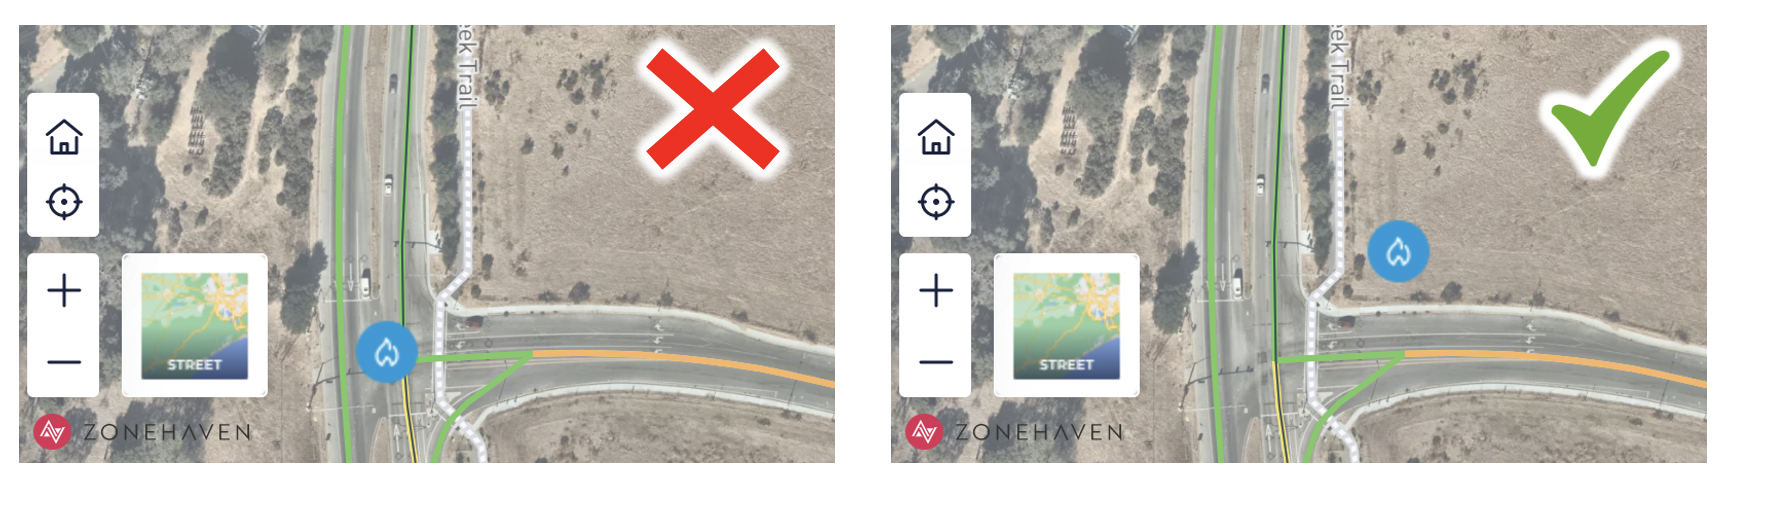
Due to occasional image mis-classification (burnable area classified as non-burnable), some areas that may be ignitable in reality, will not ignite in the simulation. In this case, move the ignition point > 30 meters and try again.