![01_GEN_MasterLogos_RGB_050423_Horizontal_White.png]](https://help.genasys.com/hs-fs/hubfs/01_GEN_MasterLogos_RGB_050423_Horizontal_White.png?height=50&name=01_GEN_MasterLogos_RGB_050423_Horizontal_White.png)
The purpose of Genasys Protect is to provide the community with a public-facing platform to view the status of their zone. Emergency responders update the status of zones to communicate their appropriate level to the public.
Knowing your zone is critical to staying safe during a public safety emergency such as a wildfire, flood, tsunami, hurricane, earthquake, or active shooter incident. Zones will be used in emergency alert notifications to clearly communicate who is impacted by an emergency and what actions should be taken.
Follow the steps below to find your zone and its corresponding status:
-
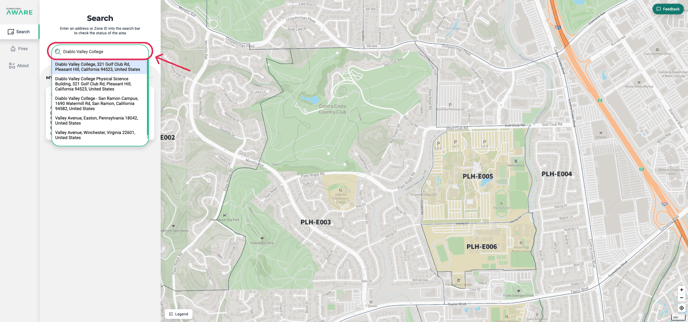
Visit protect.genasys.com and type your address into the search bar at the top left.
 Another option is to share your location. This will show you which zone you are currently in, rather than the zone for a certain address.
 -
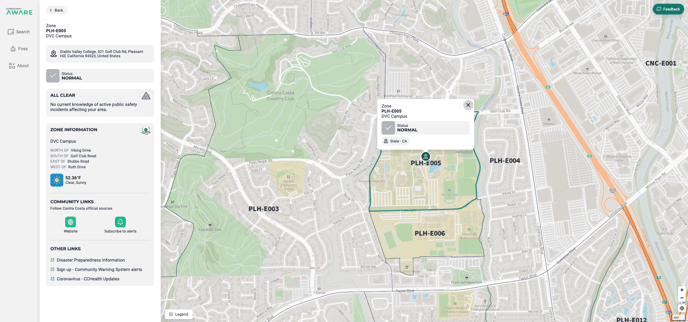
Once you hit enter, the map will zoom into your zone (which will be outlined in green). A small pop-up will appear with your zone ID and status, and the left side panel will show more detailed information about your zone.
-
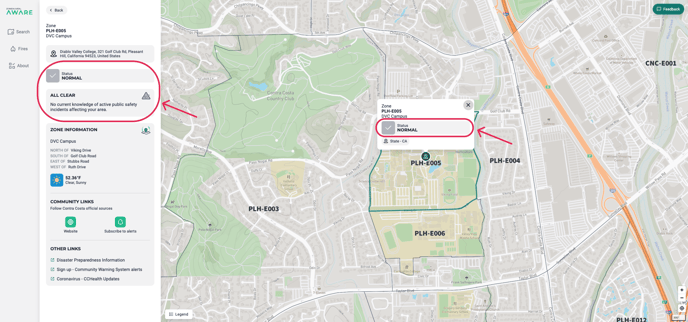
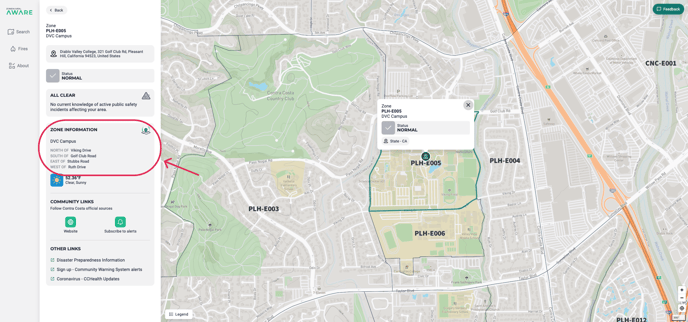
The most important information will appear in the pop-up and at the top of the left side panel. First is the name of your zone. This will be used in emergency alert notifications to inform community members which zones are impacted by the event. Be sure to write down the name of your zone somewhere easily visible, such as on your fridge or by the door, so you can quickly assess whether you are in an affected zone when you receive an alert.
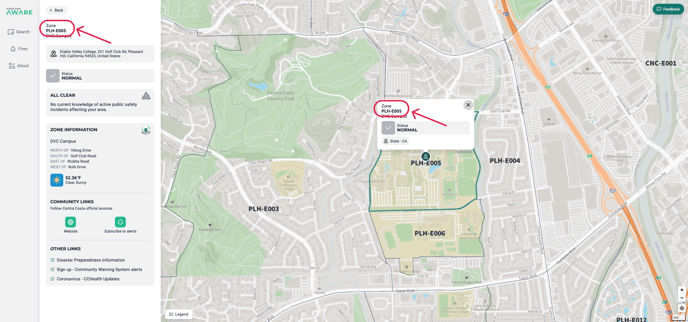
A little below the zone ID is the zone status. This will inform you of the evacuation status of your zone. A legend of the zone status colors can be opened by clicking the Legend icon in the bottom left corner of the map.
-
In the middle section of the left side panel you will find the commonly used name for the area included in the zone, as well as a description of the zone boundaries.
-
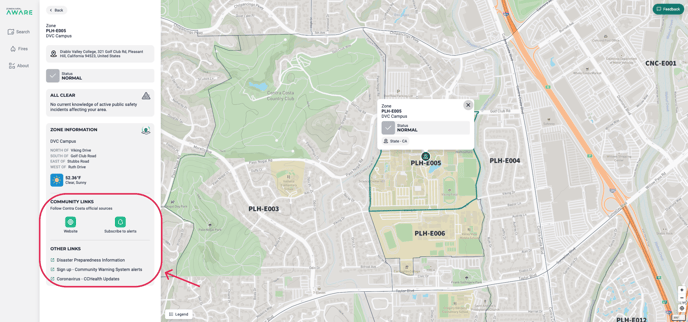
The bottom section of the left side panel contains links to helpful resources chosen by your public safety officials.
-
Don’t forget to sign up for emergency notification alerts. See this page for information on how to do so.
If you have any questions, please reach out to support@genasys.com.